Building and Deploying Rust with VSTS
Open Source Projects with Visual Studio Team Services: A cool alternative to Travis, AppVeyor, etc!

Since I started at Microsoft about 6 months ago, I had to catch up on their (our) tech: Azure, .NET, Visual Studio. Yet as an avid GitHub user I overlooked one thing completely: Visual Studio Team Services! Turns out it’s quite the hidden gem and after a colleague showed me some of its power, I had to look into it more deeply. Turns out it’s an easy and free resource for any project. Can it help your project? Yes! How? Find out below 😊
Continuous integration & Delivery
All good on the foundations? Click here to Skip to the doing.
Anyone who paid attention to the recent DevOps activities (movement?) in the recent years will agree that having a centralized, consistent build system for everybody is not only a great aide but necessary for improving productivity. Shipping packages becomes a series of steps, all automated and centrally maintained. Best practices can instantly be applied for everyone.
On top of that, the output is available for deployment after any build, meaning that a web application can be re-deployed whenever all steps pass - releases become routine. If you want to know more, Martin Fowler’s post is a good starting point.
Is Rust special? ❄
Of course, evething is special 😊. For Rust it’s mostly a case of its young age and therefore missing built-in support. However with cargo and rustup as standard tooling, the only thing required is CLI (Bash/PowerShell/*sh) access and anything can be done. It’s the shipping that can be challenging, because, as of right now, native libraries are still dynamically linked, which means you can’t simply create a binary that works everywhere - it expects libraries to be present.
But wait, there’s more!
Automated testing and building of projects with young languages is even more important:
- Compiler changes more often
- Libraries (crates) that become stale
- Keeping dependencies updated (take a peek at deps.rs if you maintain a crate 😅)
Is something wrong with Travis?
Nope, it’s great! Travis and AppVeyor work really well for testing your projects, especially on GitHub they have become the default choice. If you have a Rust project on GitHub, you should have tests and a simple CI integration checking each commit. Use this template or check out the cargo docs on CI!
Let’s get to it.
Basically there are two major ways to compile Rust with a CI system:
- Script the download and install rustup, cargo, and rustc
- Build within a Docker container
The first way is nicely described by Steven Murawski’s blog post, it works great, I recommend reading that if you want to use a cross-platform build for Mac, Linux, and Windows!
Since I am more of a container guy, this post will be about building Rust in a container. Personally, I think there are several things that make this approach great:
- Full control of the environment
- No installation required (therefore faster builds)
- Build a custom build image on top of the official build image with custom tools
- The build container is easily exchangable
Visualstudio.com
For using team services, a Microsoft account is required. If you don’t have one already, go and set one up here, it’s free and only takes a few minutes to do. Then sign up for the Visual Studio Team Services [VSTS] at visualstudio.com and create a workspace. Afterwards, create a project:
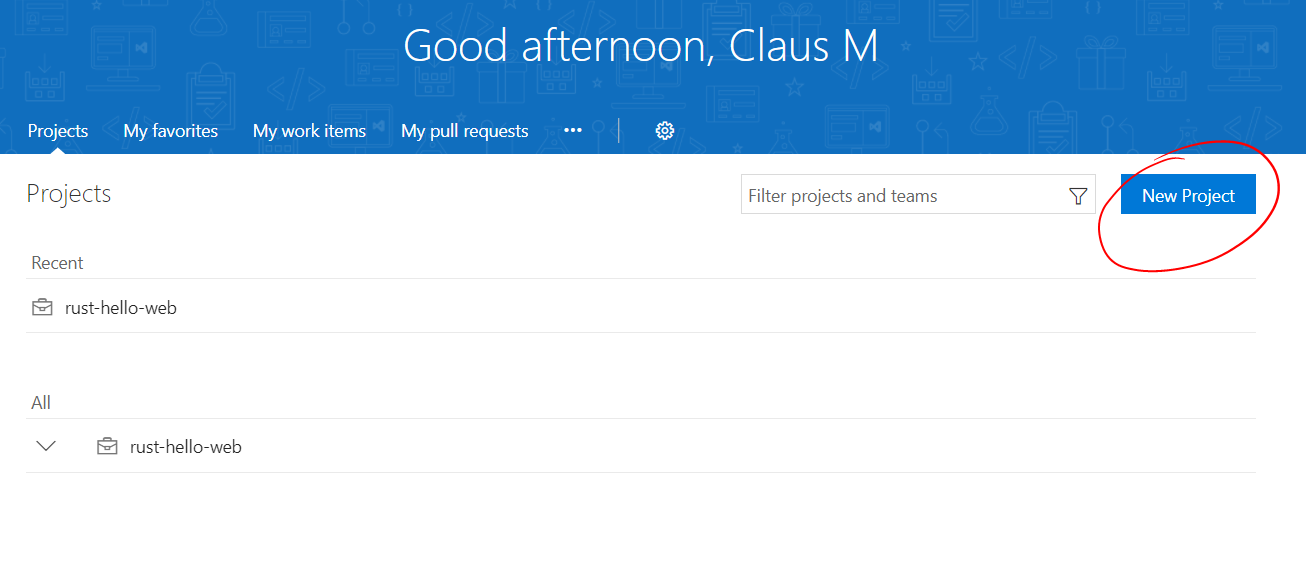
After giving it a name and choosing a version control system (use Git) along with a work item process template (agile gives you a Kanban style task board), the project is almost ready.
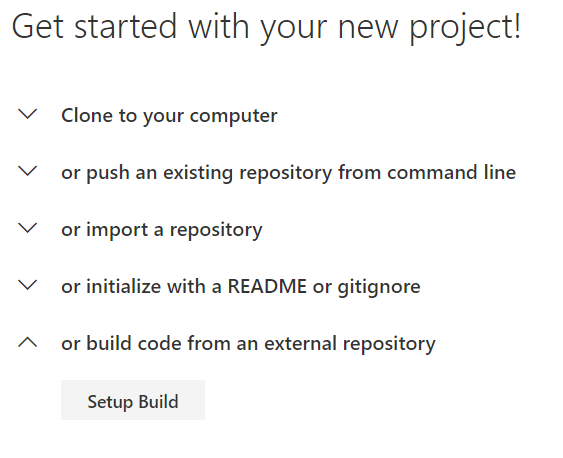
Getting the Code
Once created, the project has several aspects to look at: there are dashboards, code, a wiki, work (aka issues), build and release, and test. Each of these would warrant their own blog post, so I’ll focus on “Build and Release”. For that, I am going to host the project code on GitHub (as everybody does).
Luckily if a Git repository is accessible from the Internet, VSTS lets you use it for builds and releases.
Building the Pipeline
VSTS provides a simple web UI to build the pipeline, but can also use whatever YAML is provided to generate the pipeline from that. For initially generating the YAML I recommend just using the web UI and exporting in the end. Be aware that the resulting file can contain credentials or access tokens!
Before we start, some vocabulary:
- Tasks: This is a step in the build. Could be anything from running a script to building a container.
- Phase: A collection of tasks, executed sequentially. They can share data (e.g. Docker images) and run on an agent.
- Agent: Something that runs the service to build stuff with; i.e. a machine.
- Queue: Whatever phases are waiting to be built on an agent.
With that set, it’s generally recommended to have build, test, and publish as individual phases. For Rust, ‘Build’ can be skipped if the output is a binary file or otherwise dynamically linked since the linking will be done within the container and unless you replicate that environment it won’t work on the target system.
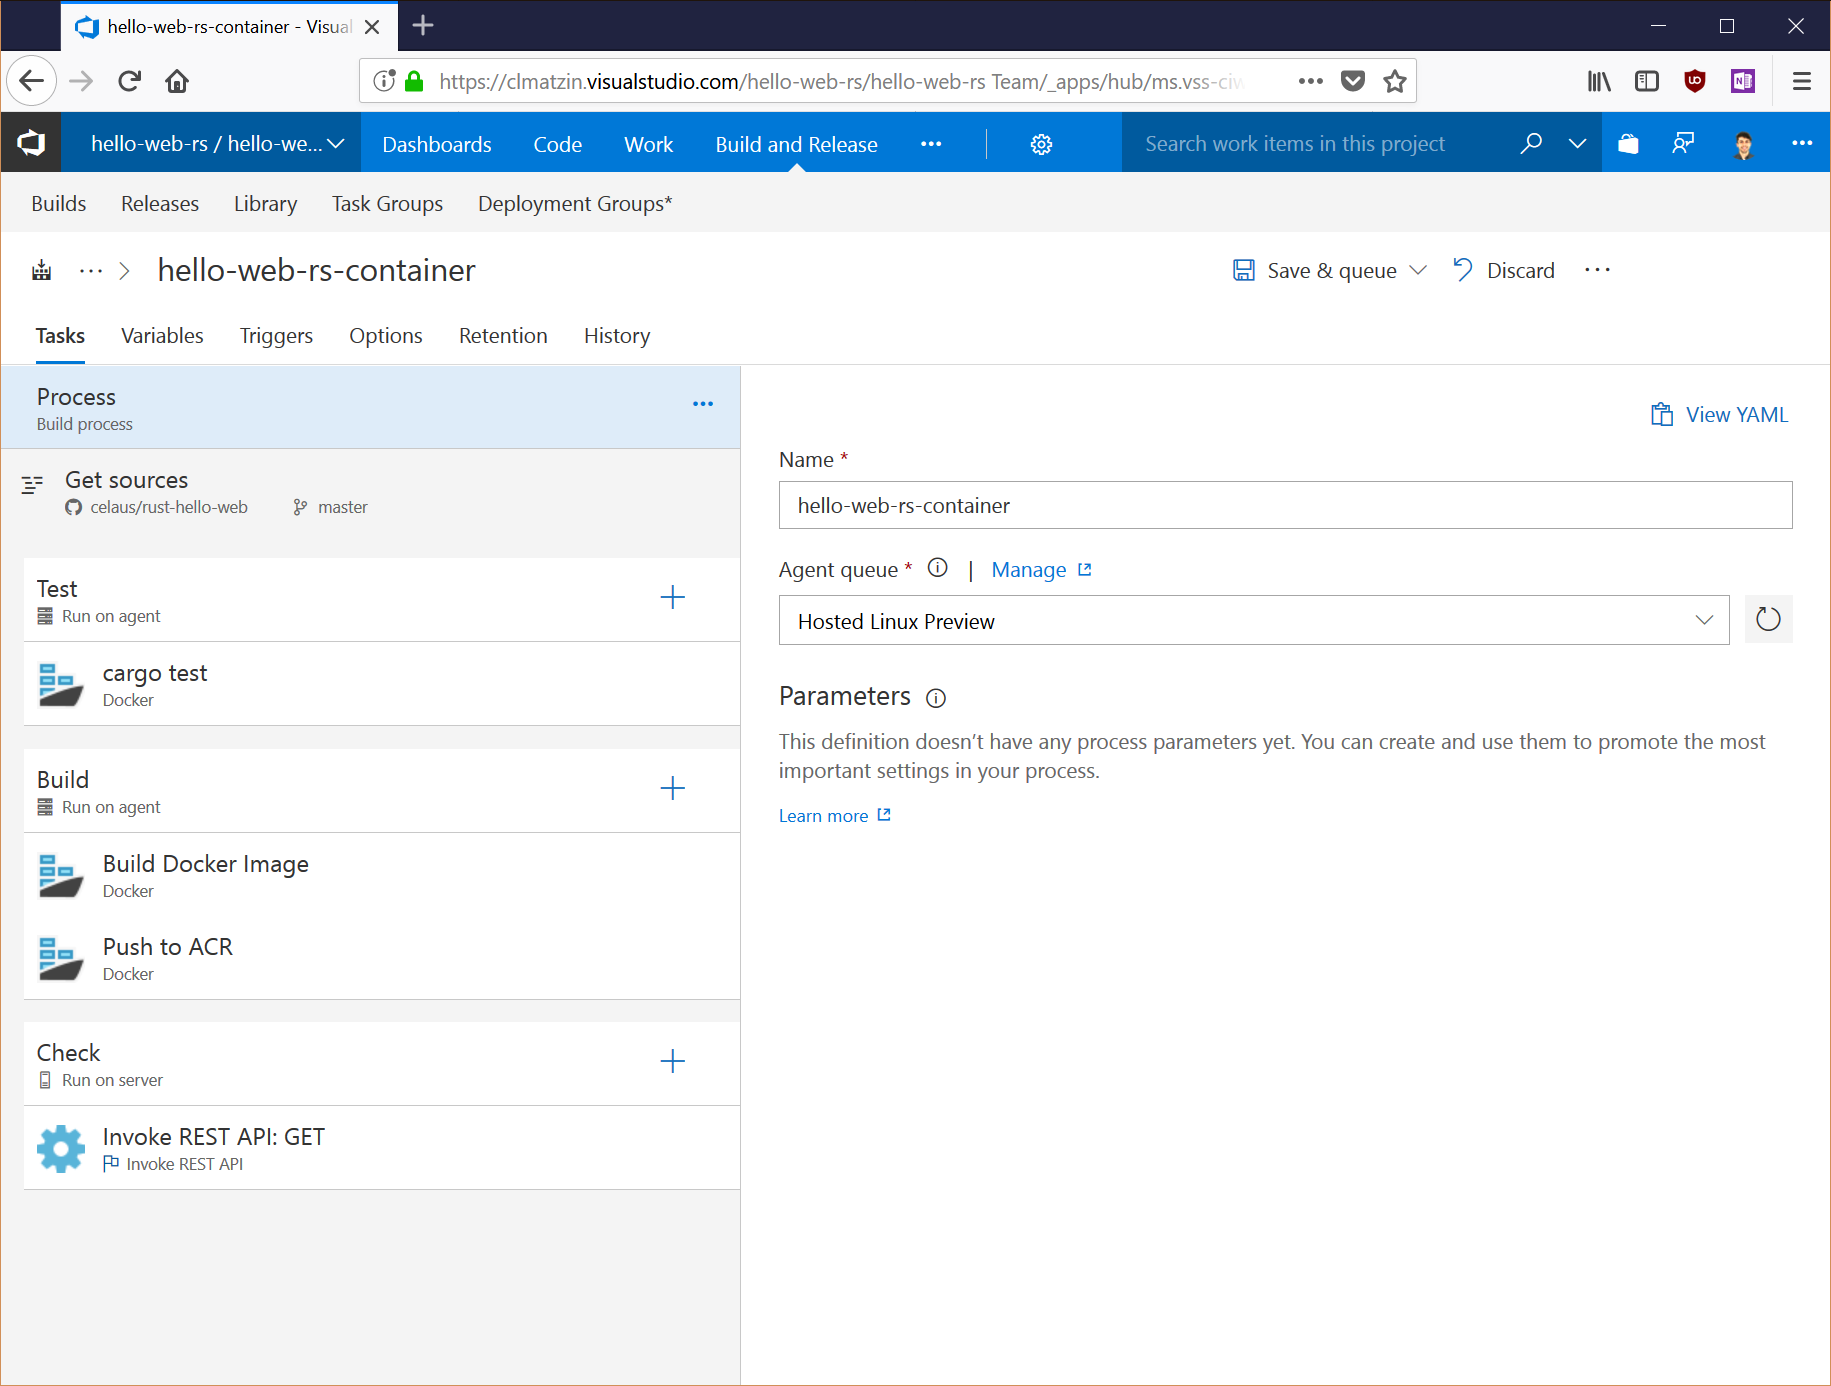
Phase: Test
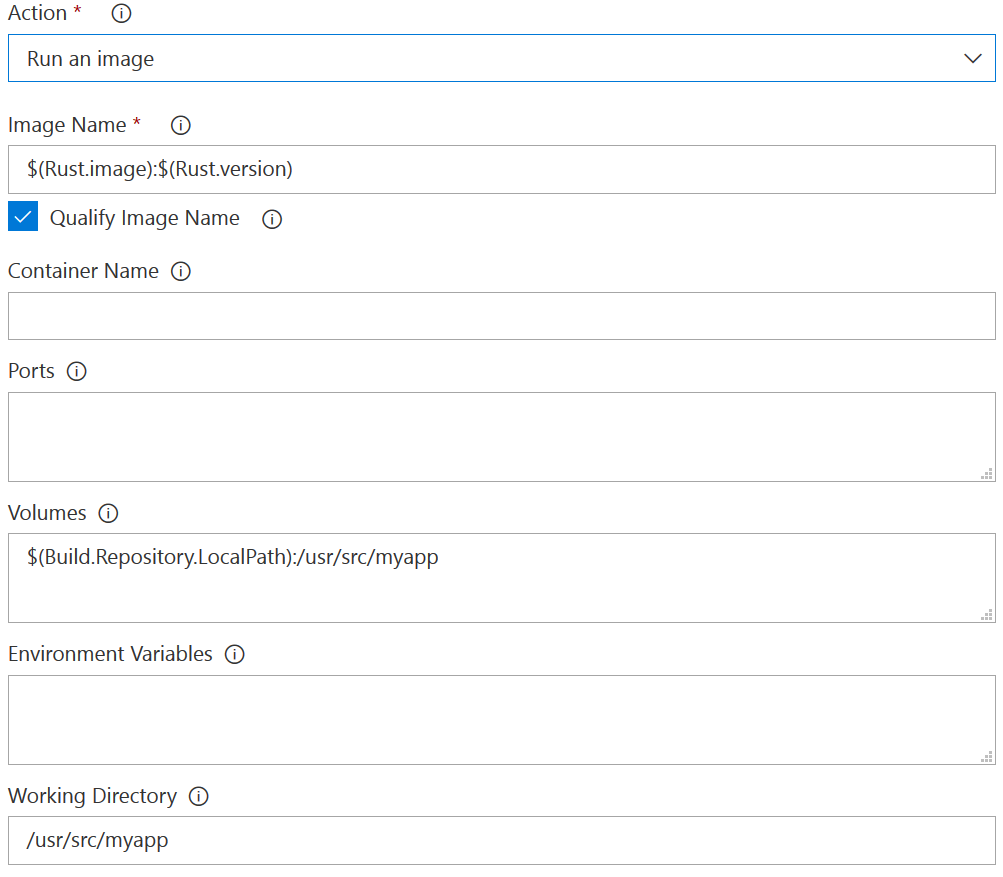
Thus, the first phase is ’test’ that essentially runs ‘cargo test’ on the sources. For that, I chose running a container with a cargo test and the source directory mounted, just like that:
$ docker run --rm --user "$(id -u)":"$(id -g)" -v "$PWD":/usr/src/myapp -w /usr/src/myapp rust:1.24.0 cargo build --release
For larger projects this might not be enough and cargo bench or some sort of integration tests would be added to this first phase.
Phase: Build Container
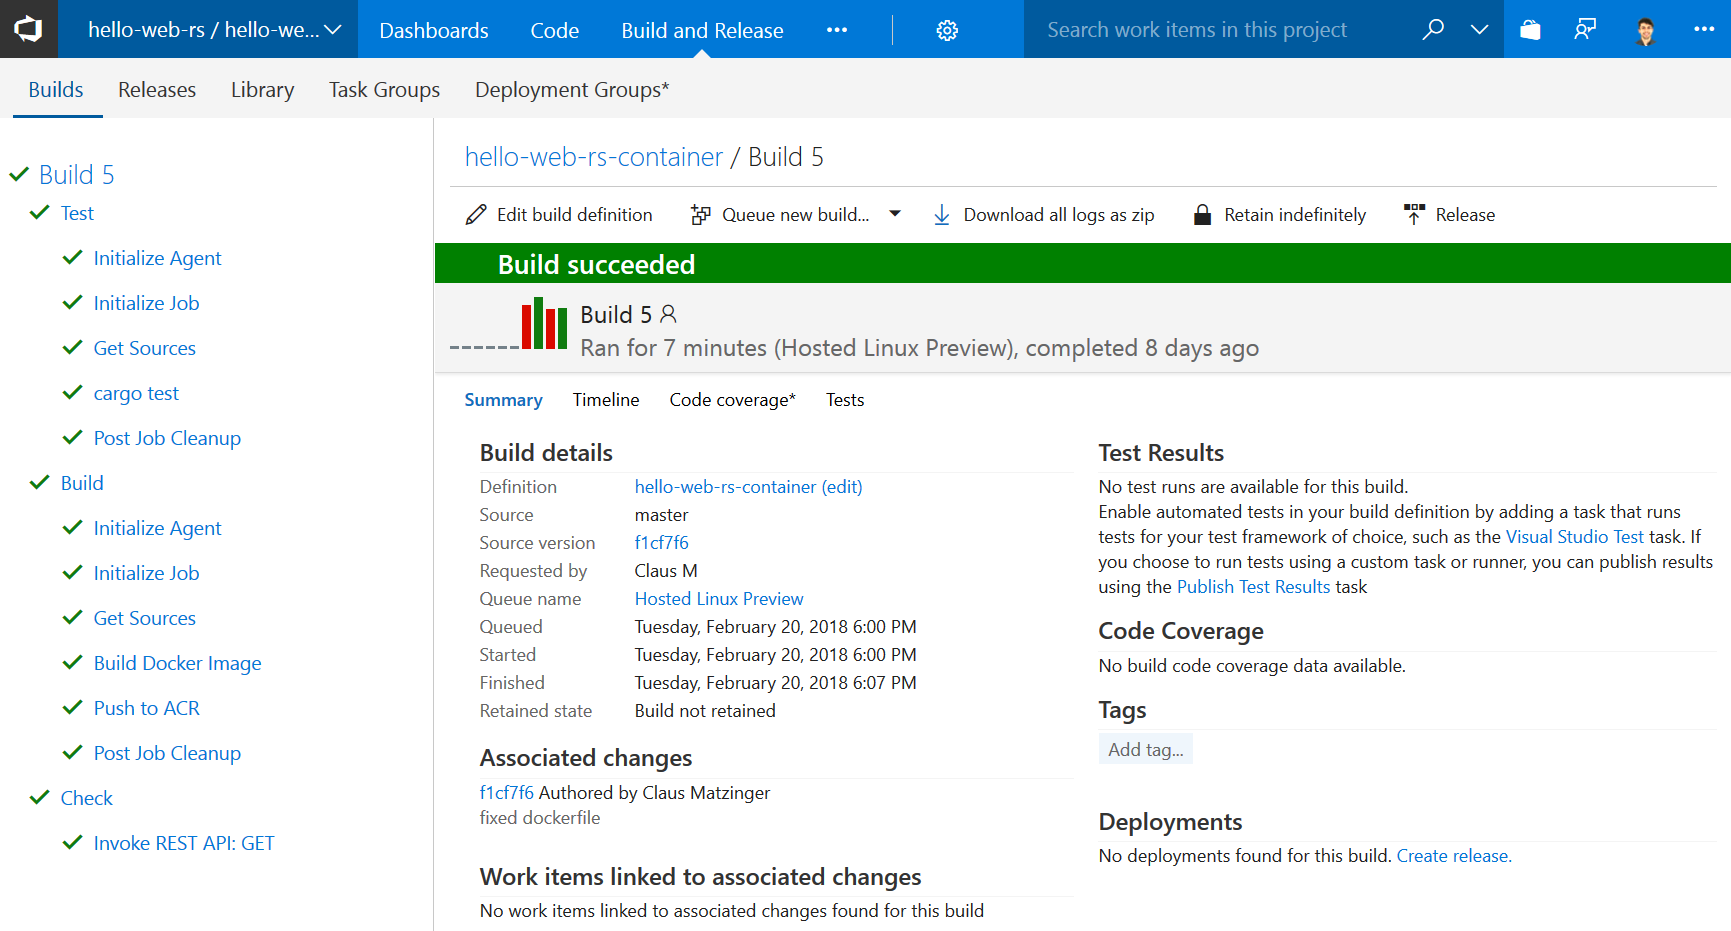
Since I am going to build and deploy using a Docker container, the next step is to build the actual container with the provided Dockerfile. In the same step (container images can’t be artifacts), the resulting image is pushed into a private Azure Container Registry (could also be the Docker Hub). On the other end, there is a Azure Web App for Containers that automatically updates its image whenever something is pushed to the repository.
Phase: Check
When deployment is part of the pipeline it makes sense to check whether it succeeded. If this is just a simple REST endpoint call, VSTS provides a pre-built task to check for JSON properties and the return status code.
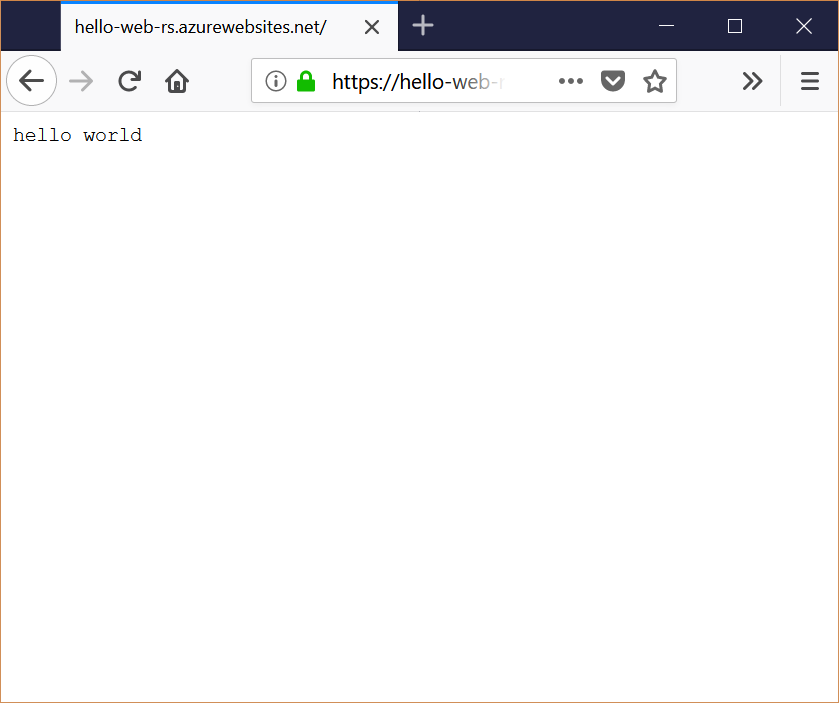
So far so good. As a last step the CI system can use the Kubernetes integration to deploy the new image into the cluster, or trigger a deployment elsewhere. In my case, a successful build includes checking if a specified REST endpoint responds with HTTP status 200.
Keeping the pipeline
One of the benefits of a continuous integration system is reproducibility. Most services on GitHub use the YAML format, VSTS allows to export every pipeline as JSON and only recently (as of Feb 2018) added the ability to export to YAML. Activate it in the settings:
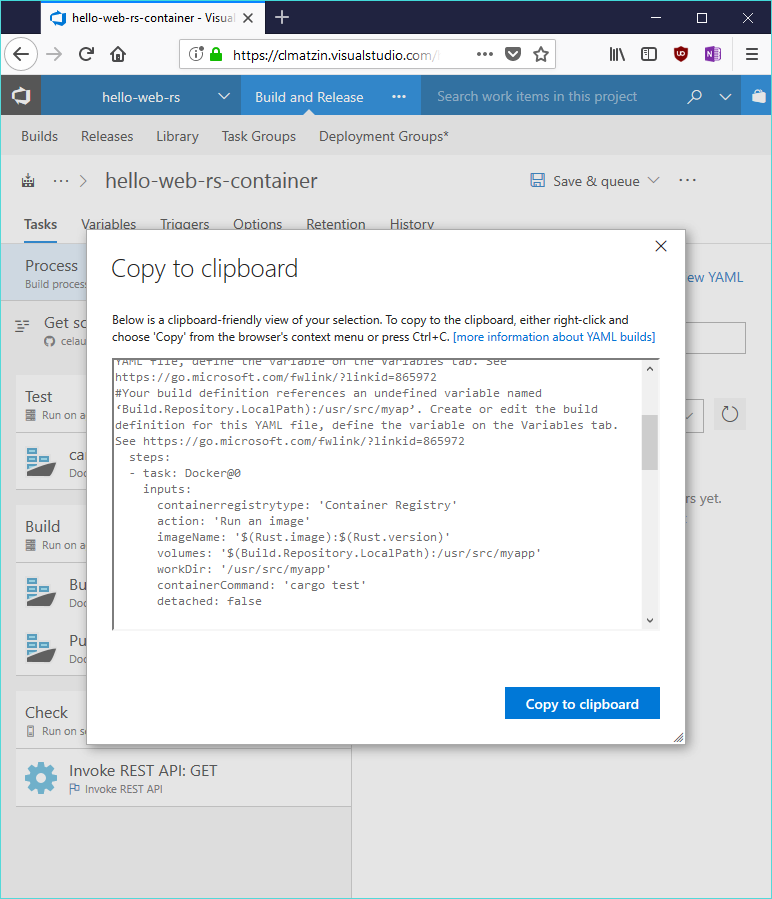
Luckily the UI makes that easy and there is a button when clicking on the entire build configuration. Alternatively, each task can be exported too!
According to the documentation, placing this file (named .vsts-ci.yml) in the root of the repository should let VSTS pick up automatically. As of this writing (Feb 2018) the system didn’t find it by itself, which is probably due to YAML support being still in an experimental state.
Economics
240 minutes of free use can get you quite far: A full build including the Docker file creation and push to the repository took about 9 minutes in a single run. Consequently this build could run around 24 times a month - almost every day. To get more builds out of the free tier, it’s recommended to look into caching strategies of the build artifacts (e.g. keep $HOME/.cargo between builds) or switch some things over to a release step that is run less often (like pushing the image to the repository).
In any case, this service can be used to build open source projects without impacting your wallet 😊
What Else?
In addition to a simple build pipeline, VSTS has support for some unique features like:
- Private agents: There are binaries for most platforms that would let you create a private pipeline (e.g. if a device is needed to run tests)
- Triggers: there is a simple tick box to automatically build on commits and pull requests.
- … and a lot more
Wrap up
VSTS is a huge collection of tools and I couldn’t possibly fit everything in a single post. However there are a few things I like about it. First and foremost it’s more flexible and powerful than the free version of Travis - which in the end boils down to:
- Build artifacts are available
- Fewer shell scripts
- Recipes for several technologies in the marketplace
- Private pipelines for your own hosts
- Windows, Linux, Mac available by default
- Integrated with project management, testing, and releases
For many projects Travis will easily suffice and its great GitHub integration can’t be beaten. However had I known about VSTS last year, I could have saved myself the trouble of maintaining my own Jenkins build server to get the flexibility I needed (for an open source project). In any case, I am convinced VSTS is a great alternative and if you feel like Travis is too small for you, you should check it out.
Further Reading
If you want to know more:
- My slides from our Meetup group in Munich (Germany)
- VSTS tutorials and insights on docs.microsoft.com
Can I solve your problem? Let me know on Twitter